Showing posts with label All Natural. Show all posts

Thursday, February 11, 2016

Essential Oil Diffuser Blends

I have a confession to make.  I love to mix up my oils for diffusing, and test them out on my family.  Some are wonderful, exciting, and uplifting!  Some smell like what you might find in a barn.  No matter, my kids are forgiving.


But here are a few of the blends we love most.  Some are my own concoction, some I found on the net.  I admit, I have a diffuser in every room.  Kids' rooms, living room, kitchen......  The trick is to not have too many diffuser blends going at once or your house might smell suspicious.  If you know what I mean.


Relaxing Sleep
3 drops Lavender
2 drops Cedarwood

Calming
4 drops Lavender
4 drops Vetiver
2 drops Frankincense

Allergy Season
4 drops RC
2 drops Eucalyptus Blue

Clean Day
4 drops Citrus Fresh
3 drops Lime Oil

Invigorating
4 drops Peppermint
3 drops Orange

Flower Garden
3 drops Lavender
2 drops Ylang Ylang
2 drops Geranium
1 drop Roman Chamomile

Spring
2 drops Lavender
2 drops Lemon
1 drop Rosemary

Summer
4 drops Tangerine
2 drops Lavender
1 drop Lime
1 drop Spearmint

Fall
4 drops Orange
2 drops Cinnamon
1 drop Clove
1 drop Nutmeg

Winter
balsam fir
orange
cinnamon bark

Sometimes, after a cleaning day, I like to use just orange or lemon oil in the diffuser for a fresh scent.  And Christmas Spirit with an added drop or two of orange oil is our favorite during Christmas time.

If you have any questions about Young Living Essential Oils, you can contact me to learn more, or go to my personal website.

Experiment with your own blends.  What are your favorites?  I'm always looking for new ideas!

You can also find out more by browsing my Pinterest Essentail Oils board!

Wednesday, February 03, 2016

Thieves Essential Oil


This is one essential oil I am never without.

Thieves oil is a blend of five essential oils: Clove, Lemon, Cinnamon, Eucalyptus Radiata, and Rosemary essential oils.  If you aren't using it as a disinfectant, this blend is great to diffuse.  

There is a legend behind the Thieves blend.  And as the facts of legends tend to vary, you may have heard a rendition before.  The story I heard goes like this.  (very short version)  There were four thieves (or spice traders or spice merchants) who understood the potent protective powers of herbs and spices.  They made a concoction of the five spices and herbs in the Thieves blend in vinegar and put them on their body.  The plague struck, people died in the streets, and the thieves made their way through the towns, covered in their vinegar oil blend, and basically pick pocketed dead bodies.  Supposedly they never caught the plague.  Interesting, right?


How Our Family Uses Thieves Essential Oil

We have used Thieves as a cleaner, in toothpaste, and deodorant.

The powerful cleaning abilities of Thieves makes it a handy oil to add to your natural cleaners.  We fill a spray bottle with 1/2 white vinegar, 1/2 distilled water, and several drops of Thieves oil.  I use it to spray down counters, toilets, bathtubs, and kitchen table.   I also add it in my mop water, and put a drop or two in my toilet.  I have also put a couple of drops on my throw rugs in the bathroom and kitchen.  It leaves a nice, clean, cinnamony scent!

We gargle with a couple of drops of Thieves oil diluted in a little water.  It supports a healthy mouth, gums, and throat.

My family takes Thieves oil internally.  I put a couple of drops of thieves and a couple of drops of honey in a gelatin capsule and swallow.  We take this to support our health during seasonal illnesses and to help encourage a healthy immune system.

Diffusing it?  Of course!  I love the cinnamon smell, which is the strongest to me.  We especially like to diffuse Thieves in the fall.  It has a holiday seasonal scent!

Disclaimer:  Again, I am not allowed to share with you the full benefits of Thieves oil to our family.  Do some research and decide for yourself how this amazing blend can fit into your family's lifestyle.  Also, Thieves can be kind of hot on the skin, so be careful and you should consider diluting with a carrier oil before applying or taking internally.  And as always, please consult your doctor especially if you are pregnant, nursing, or on any medications.

If you have any questions or are interested in learning more about Young Living Essential Oils, please feel free to contact me!


Lavender Essential Oil


Oh my, the many uses.  When I hear the word Lavender, I think of a relaxing, English garden.  Or fields full of purple blooms in the Hill Country of Texas.  But mostly, I think of my mom. It was her favorite scent.  She had sachets, lotions, soaps, and linens fragranced with lavender.  So, besides it's many benefits, I'm kind of sentimentally partial to it.

Lavender oil can be used in skin care products, your daily cleaning regimen, refreshing your linens, and offers a myriad of skin supporting benefits.

We use a couple of drops of lavender in baby bath water for its relaxing effect, and as part of a nightly routine.  Rubbing lavender on the back of your neck or bottom of your feet can aid in a restful sleep.  You can try a couple of drops on your pillow.  It's also great in a diffuser as it leaves a clean, fresh floral fragrance in your home.

I add a few drops of lavender to my moisturizer and try to take a relaxing detox soak once a week.  For my bath, I add 1 cup Epsom salt, 1 cup baking soda, and about 10 drops of lavender oil. 


We also have used lavender oil for pest control.  Most bugs and rodents hate the smell.  When we store our seasonal clothes, I place about 4 cotton balls in the top of the clothing container with a couple of drops of lavender each in them.  We've never had an issue with silverfish or roaches or moths getting into those containers.

And if you want to make a room or linen spray, all you need is a small spray bottle filled with a mixture of 2T vodka or witch hazel, 6T of water, and 10 - 12 drops of lavender essential oil.

Also, I use it on my animals.  We have made a spray like the one above, and we have also just rubbed it on neat.  It makes a good "in-between bath" freshener for my dogs, and it's also beneficial for repelling fleas and ticks.

Disclaimer:  Once again, exercise caution and common sense when using essential oils.  Some people have skin sensitivity issues so you may need to test the oils out on a non-sensitive area of your skin, or consider diluting with a carrier oil.  Before using essential oils, always consult your doctor if you are pregnant or nursing.


Monday, February 01, 2016

Essential Oils.........Peppermint


Gotta be my all-time favorite.

Maybe it's because it was the first oil I was ever introduced to, or because the smell is uplifting and refreshing.  For many reasons, it's always a staple in my oil cabinet!

And, who hasn't heard of peppermint?

Here comes my disclaimer...

Annoying, but has to be done.

Now, because the FDA will not allow me to share with you a detailed account of the amazing health supporting properties essential oils have brought into my life, I will have to leave the research and common sense up to you to determine the needs of your family and how oils can fit into your lifestyle.  Use wisdom and exercise caution.

Moving on.  For our family, peppermint plays an essential role.

How we use Peppermint Oil.

After exercising.  I love to rub peppermint on my muscles after a workout.  It leaves a tingly, refreshing feel on my legs and arms, and leaves me feeling invigorated.

To support our respiratory health.  Peppermint is refreshing in a steamy bath or shower, and perfect for use in a diffuser.

Cleaning.  We clean with peppermint oil, as well as diffuse for a refreshed smelling household.  You can add peppermint oil to any soap, shampoo, and other natural cleaning products.  And if you use wool dryer balls, put a couple of drops onto the balls before you throw them in the dryer!

Toiletries.  My daughter makes toothpaste, deodorant, and lip balm, and loves to add peppermint oil to all of her recipes.

Cooking.  Peppermint oil is great for cooking with.  And since Young Living Oils are pure, and the oil properties are strong, peppermint will go a looooong way.  I put a drop or two in hot chocolate, and I have made a peppermint mocha coffee creamer.  Delicious!

Uplifting.  And no lie, peppermint makes me feel alive and energetic. Like how my twins feel when they find get ahold of sugar.  I enjoy just opening up the bottle and sniffing it.  Makes my senses come to attention.  And did you know that if I need to clean out my sniffer, like if I've been sniffing a lot of other fragrances or oils, peppermint clears out and reboots my smeller.  Kind of like coffee does.

I do warn you, be careful if you get peppermint oil on your skin, some people can be a bit sensitive to it.  It's best to dilute with a little V-6 oil, or olive oil, or coconut oil before putting it on your skin.

And as always, if you have any questions about essential oils, please feel free to contact me!

Wednesday, January 27, 2016

Why We Love Essential Oils

The first time I used essential oils, a friend gave me a sample of peppermint, and I was more than skeptical.


I was told of the many health benefits of using essential oils, heard their glories sung, yet I still had a hard time believing that just a drop of peppermint oil could do so much.

Then I tried it.

And WOW!

But then I made a major mistake.  I went searching for peppermint oil outside of Young Living. Cheaper?  Yes.  Quality?  Could not compare.  Where I used one drop of YL peppermint oil, I had to use 15 drops of the "other brand" to get an even close comparison.  And then I realized.  The other brand was diluted.  Sub-par.  Unequal.  Inadequate.  The quality just was not there.  And as far price goes......YL was far more cost effective, besides the fact you are saving on your health in the long run!

So, I called my friend, and told her I wanted to sign up with Young Living.  That simple sample of peppermint oil had forever changed my life.

I have been using Young Living Essential Oils for 10 years now.  There is no going back.


How do we use essential oils?

We use them for everything from supporting our health to cleaning to aromatherapy.

And honestly, sometimes the smell just makes me happy!

No more harsh cleaners
No more toxic candles
No more perfumes
No more personal care items full of chemicals

We use them in our garden, on our pets and livestock, and in bedding, barn, and coops.  The health of our family is a witness to the many supporting benefits of using essential oils.

I love that everything we make can be all natural, including using the oils as a fragrance. You can even cook with them!

Seriously, what better way to utilize the gifts God has packed inside all of those marvelous plants He created?  For our benefit and pleasure!


Do you have questions on how to get started?

There are so many essential oil companies to choose from.  You should choose your essential oils based on quality, ethics, and support.  I have used Young Living Essential Oils for 10 years.  I trust the company, without a doubt.

If you are interested in oils for your family or personal use, you can visit my Young Living personal website.  And if you have any questions, please feel free to contact me and I will answer all that I can!

But, did you know that you could sign up as a distributor and save up to 20% off your essential oils?! 


Premium Starter Kit

At sign up, you can save big by purchasing a Premium Starter Kit containing a collection of 10 Essential Oils, plus a handy bottle of Stress Away, AND a home diffuser.  I LOVE my diffusers!  This set also includes all the resources you need to help you get started in sharing Young Living Essential Oils!  An exceptional value!


Basic Starter Kit

You can also save when you purchase a Basic Starter Kit, at sign up, containing a set of basic essential oils.

As a Young Living Distributor, you are not required to order every month.  You can order as much or as little as you need or want.  But I do suggest signing up for Young Living's Essential Rewards program if you plan on making a consistent order each month.  It saves you on shipping, and you can earn points towards free products. You also are not obligated to sell essential oils, but I warn you, once you begin using them and benefit from their amazing and powerful effects on your household, you will want to share the news with everyone!

Are you interested?!  Are you ready to get started?
Sign up HERE!

Again, please feel free to contact me with any questions, I am eager to help!

If you're still not sure, stick around, I'll be sharing my top 5 favorite oils.  Those that truly made a believer out of me!


Disclaimer: The information on this website is based upon my research and personal use of Young Living essential oils.  I am an Independent Distributor of Young Living Essential Oils.  The statements made and the products mentioned have not been evaluated by the Food and Drug Administration and are not intended to diagnose, treat, cure, or prevent any disease.   If you are pregnant, nursing, taking medication, or have a medical condition, consult your physician before using these products.

Monday, March 02, 2015

Homemade Bread from the Wheat Berries Up


If you've never had a thick slice of homemade bread, straight from the oven, slathered with butter (grass-fed, of course!), then you are truly missing out.

I started making bread several years ago, when I began to eliminate all processed foods from my diet.  I used organic wheat flour purchased from the grocery store, but later learned to grind wheat berries and make my own flour.  The quality and freshness is well worth the extra step.

I start out by grinding 3 cups of hard white wheat berries with 3 cups of the hard red wheat berries, to make a mixed flour.  I found that if I used all hard white wheat berries, my bread came out too soft, and if I used all hard red wheat berries, my bread came out too dense.  The two together seems to make the bread just right.  Grinding the six cups of berries will give you more than six cups of flour.  For any flour you have left over after you make your bread, put it in a container and keep it in the freezer.  Keeping the extra flour cold will maintain its freshness.


Basic Whole Wheat Bread Recipe:
4 Tablespoons coconut oil or olive oil
4 Tablespoons raw honey
1/2 tsp salt
2 cups plus 4 Tablespoons very warm water
6 + cups organic whole wheat flour
2 Tablespoons yeast

Makes 2 loaves

For a list of supplies and equipment, go here.

*Note* I like to add only half my flour to start out with and then let the mixture sponge before adding the rest.  I do this instead of punching down my dough repeatedly.

In a mixer with a dough hook, mix oil (make sure your coconut oil is a liquid), honey, salt, water, ONLY 3 cups of flour, and yeast.  Mix until well blended.  Your mixture should be kind of runny, almost like a cake batter.  Let this sit with the cover on your mixer or a tea towel across the top of your bowl for 10 minutes.


Next, add in the remaining flour, slowly, while your machine mixes.  You may not need the whole 3 cups, what you're looking for is the sides of your bowl to be clean and a soft dough.


Then turn out your dough onto a floured surface, and divide into two loaves.  You can put your loaves into oiled pans, or line your pans with parchment paper.  I had forgotten the parchment paper when I took this picture, but the later picture shows how I typically line my pans.


Preheat your oven to 350 degrees.  Cover your loaves with a tea towel and let rise in a warm place until double in size.  It should take about 30 to 40 minutes.  In the summer, my bread rises quickly, in the winter it takes a little longer.  I place my loaves on top of the stove which keeps slightly warm as the oven heats up.


Parchment lined pans, and fully risen bread loaves. Carefully place the pans in the center of your oven and let bake for approximately 25 minutes.  Your bread should be golden brown on top and sound hollow if you thump it.  Just don't thump too hard.  ;)


Let the bread cool for about 5 minutes before removing from the pan, the paper will slide right out, and peel right off of your loaves.  I then let my loaves fully cool on a cooling rack.  That is if there is any left to cool.

As difficult as it is to sit and watch your bread cool off while holding a knife and grass-fed butter in your hands.......be patient, if you cut it too soon, the bread will squish, tear up, and fall apart.  I promise, it's well worth the wait!


Wednesday, February 25, 2015

Homemade Bread Basic Supplies


Because my bread making post will be lengthy and picture heavy, I decided to first give you a list of ingredients and supplies I use.  These are for my basic whole wheat bread recipe, which I'll be sharing in the next day or two.

I buy my wheat berries from Azure Standard.  I know you can find them various places online, and if you don't want to grind your wheat, azure standard also sells flour.  You can also find unbleached organic flour in some stores or whole foods markets.  I mix my wheat berries, half hard red wheat and half hard white wheat.  I get a fairly good hearty wheat flour, but still is soft and rises well.

The mill I use is the Nutrimill Classic Grain Mill.  There are several on the market, from hand cranked mills to fancy electric ones.  I kind of found a middle of the road mill and haven't regretted the decision.  It grinds wheat berries, corn, beans, and various other grains.

I absolutely LOVE my Bosch Universal mixer, which I bought 8 years ago.  Mine has the blender attachment, and you can buy many other attachments to go with it.  We use it for everything......... bread, cookies, cakes, smoothies, etc.   It mixes evenly, and I like that it has an open top with the mixing tools inside the bowl, rather than having to deal with the motor and tools being over the top of the bowl.  It just makes it easier to work with.


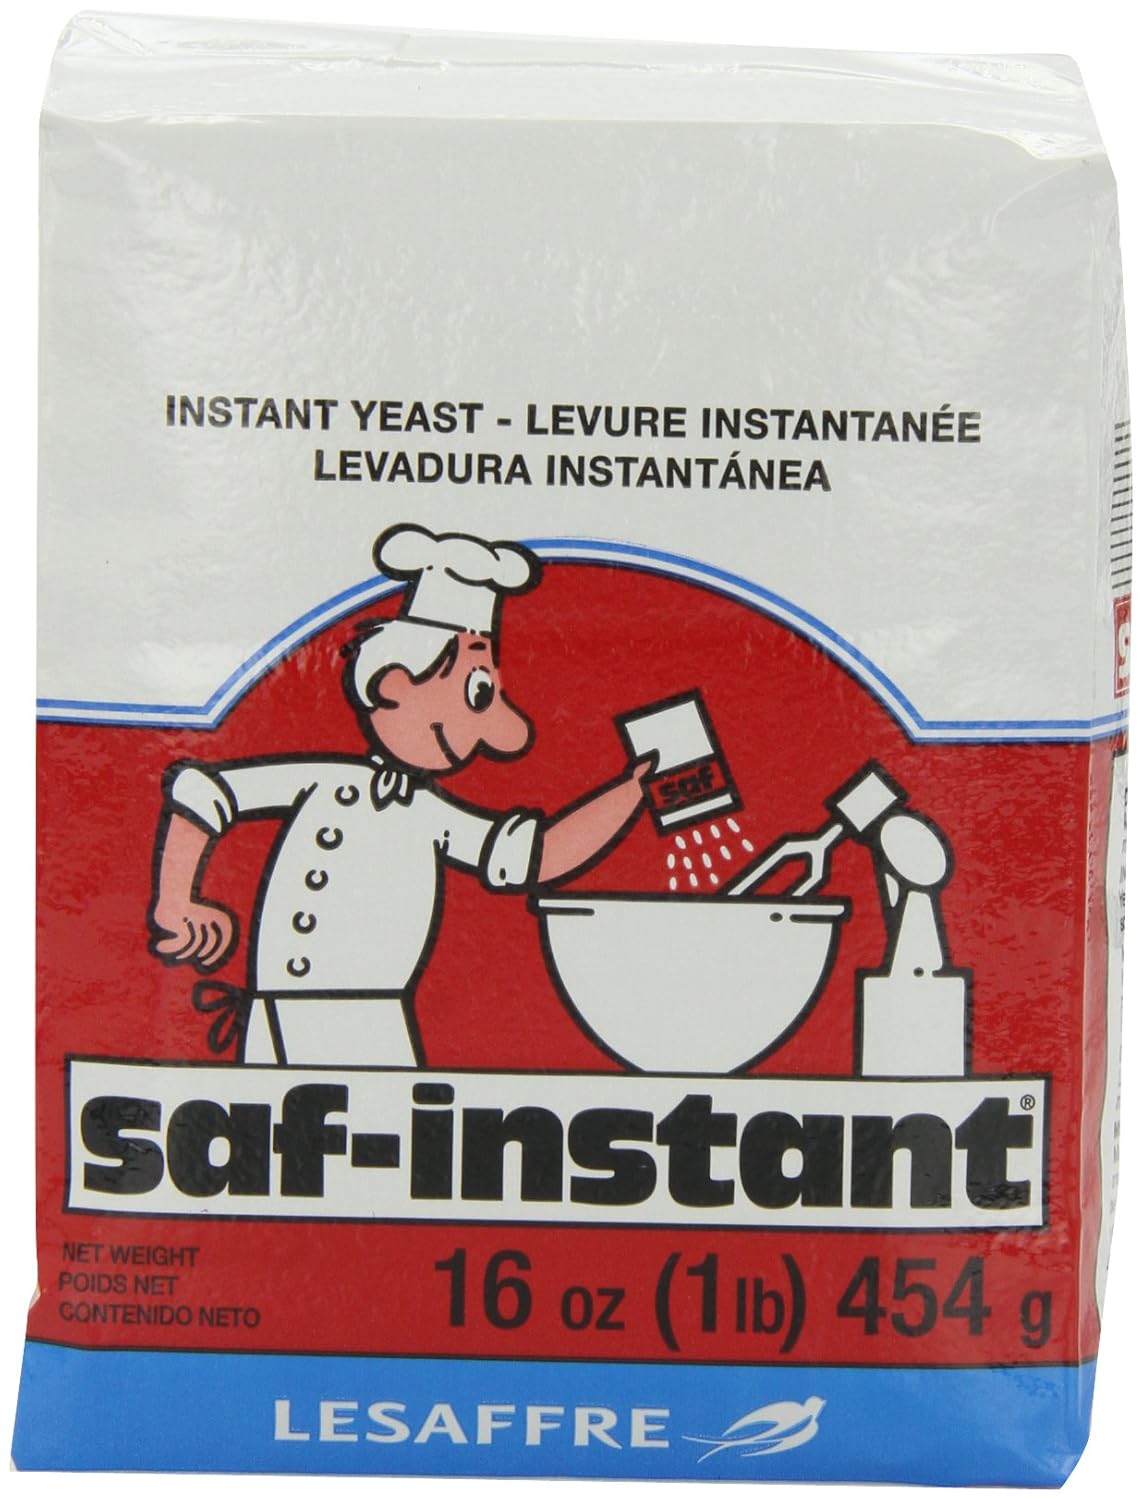
SAF Yeast is the best yeast I have ever used.  My breads rise beautifully every time.  The packages come vacuum sealed, so after I open them, I store them in my refrigerator.

I prefer coconut oil or olive oil for bread.  Usually I use coconut oil for my baking, but if it's winter, when my coconut oil is a solid, I use olive oil unless I have the time to melt the other.

I am blessed to have a local raw honey supplier about 10 miles from my house!  I don't use any other type of sugar in my bread, but you may prefer an organic unbleached sugar.

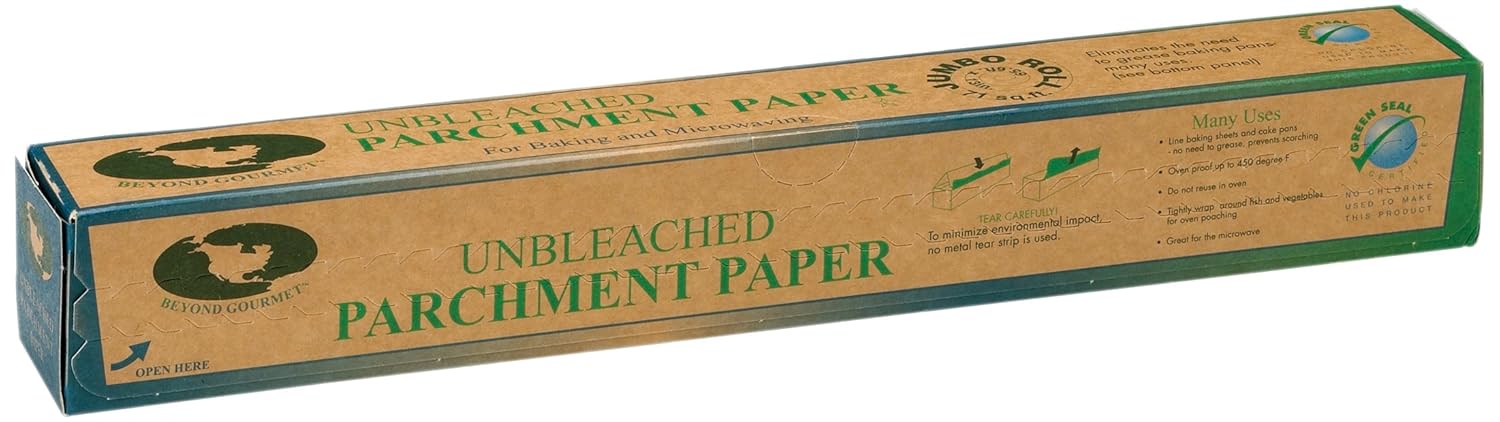
I line my bread pans with Parchment Paper.  It helps my bread cook more evenly and makes cleaning up simple!  The bread doesn't stick to the paper, and when you pull the paper out of the pan, it's clean!  Doesn't get any easier than that.


I have used several types of bread pans, but my favorite is just a simple stainless steel pan. 

If you're just getting started in bread making or using whole organic flour, don't feel like you have to start big. Start small, like I did.  I went to the store and bought an organic wheat flour, and used what I had to try my hand at bread making.  Over time, I expanded to where I am now.  Don't get overwhelmed, and take your time and practice!

Wednesday, February 18, 2015

Why I'm Not Gluten Free Anymore


For roughly eight years, I was a wheat grinding, bread making, whole grain berry eating, machine.  When I was first diagnosed with thyroid disease, I had a difficult time adjusting to medications and eventually turned to real and organic foods.  Which included whole wheat berries and homemade bread.  The results were astounding to my health.

Fast forward a few years, to when I had my second set of twins, my mother was sick, my in-laws had moved in with us, and I had 4 children 3 and under.  I admit, in all of my stress, I was in survival mode, which introduced store bought breads, snacks, and and many other no-no's to my diet.  I started back on the downward spiral to poor health, weight gain, migraine headaches, fatigue, and frequent illness.  I knew better, I just couldn't get back on track.

Once I decided to make the necessary changes to get back to good health,......my grinder broke.  So, for a year, I tried my best to eat healthy.  And no matter what I did to change, I still felt horrible.  Which then led me to believe I had a gluten intolerance.  Because that's the popular thing to have right now, right?  More expensive specialty food.  Ezekiel bread, sprouted grains, gluten free everything.  It was getting pricey and annoying.

Then I had a light bulb moment.  For the many years I was grinding my wheat and making bread, I never felt bad when I ate wheat products.  EVER.  Yeah, I know, I'm a little slow sometimes.  So, I saved up and bought a new grinder, started over again, and I feel great.


Did you know that store bought bread is depleted of all it's natural vitamins?  The berries are ground and bleached and stripped of all vital nutritional value until it's left with nothing?  Vitamins and nutrients that are important to our everyday health.  Especially for women.  And then, back in the 40s, the government decided that synthetic vitamins needed be placed back in the flour after destroying it's original design.  So now we have "enriched" bread.  Meaning nothing really.

All of which makes it difficult for our bodies to process.  Mine especially.  So, I really didn't have an allergy to gluten.  Just an allergy to junk or processed foods.

I do believe that there are people who have a true allergy to gluten, but a gluten free lifestyle was not the best option for me.  My body needs the whole grains and all of the amazing health benefits they provide.

Next time, I'll share my basic bread recipe and how I grind my grains!

Wednesday, February 06, 2013

Sprouting Alfalfa Seeds

There is a lot of power packed in those tiny alfalfa sprouts.

I eat them on salads, veggie wraps, sandwiches, and my youngest daughter eats them alone.  By the tiny handfuls.

Alfalfa sprouts are a good source of Vitamin K, Vitamin C, and Vitamin A.  They are rich in calcium potassium, magnesium, and phosphorus.  And they can help lower your risk of heart disease, certain cancers, and bone loss.

Plus, I think they taste great.

Alfalfa seeds are easy to sprout.  It typically takes five days until they're ready, so I keep about 3 jars on a rotating schedule, because we seem to run out pretty quick!


You can buy bulk alfalfa seeds from online seed companies and Mountain Rose Herb.  I purchase my seeds from Azure Standard.

I have this handy sprouting screen that I purchased through Azure Standard, but you can find one like it on Amazon and probably various other online sources.  You can also use a cheese cloth instead of the sprouting screen, but the screen is oh, so handy.  It fits right inside a wide mouth mason jar ring.


Day One:  Put one tablespoon of alfalfa seeds into a quart sized jar.  Cover with water and let soak for 4-8 hours.  Drain the water, then more than cover the seeds with water again, swish around and drain.  Don't turn the jar upside down to drain the water, otherwise, the seeds will stick to the screen.  Turn it on its side and slowly drain the water.  I like the seeds to stay on the side of the jar near the opening, but not to cover the opening.  I think they get plenty of air flow that way, and you won't have any trouble with the possibility of your seeds becoming moldy.  

Once the water is pretty well drained out, leave the jar on its side, or at a slight incline, with the mouth facing downward.


Day Two:  You can see the seeds are just beginning to sprout.  Put more water in the jar, swish around a bit, gently drain the water again, and set the jar on its side.


Day Three:  It's amazing how quickly these seeds sprout.  Fill the jar with a bit of water, gently swish and drain, leave the jar on its side.


Day Four:  You can eat the sprouts at this point, but I like to give mine one more day.  There are more greens on the fifth day.  Fill your jar with water to cover the sprouts, gently swish and drain, leave the jar on its side.


Day Five:  Ready to eat!  I remove the screen and replace it with a regular lid, and store the sprouts in the refrigerator.

Enjoy!

Tuesday, January 08, 2013

Making Chicken Stock

I use chicken stock as a base for just about everything.  I always cook whole chickens in my crockpot, so when it's done, I strip the meat off of the bones, set that aside, and throw the carcass remains back into the crockpot.  I leave all of the seasonings, onions, garlic, bones, fat, skin, bits of meat, and anything else that I have left after cooking my whole chicken.


Then, I cover everything with water and cook on low for 8 hours.  


When the stock is done, I let it cool for about an hour, and then pour everything into a strainer with a large bowl underneath.  Once it's cooled down, I pull the strainer out and pour the broth from the bowl into plastic baggies, four cups at a time, and store them in the freezer.


I do have a pressure canner, and I intend to learn how to use it so I can store my stock in mason jars on my pantry and save on freezer space!

I'm still a little scared of the pressure canner...

Thursday, November 15, 2012

Five Days of Homemade Christmas Gifts: Bath Salts, & Linen Spray

Bath salts.  Definitely a "mom gift".  Like most moms, I don't remember the last time I took a hot, relaxing bath.  So, receiving a pretty jar filled with scented bath salts, might just make me think about taking the time to enjoy a good soak.  Plus, the benefits of the salts and essential oils on the skin, leaves one feeling soft and refreshed.

Bath Salts:
1 cup of Epsom Salt
1/2 cup of Baking Soda
1/2 cup of Sea Salt (or table salt)
10 - 20 drops of essential oils  (we use lavender)

Mix together well, and fill a 1/2 pint jar.  This will make two half pint jars.  Then tie a ribbon or tulle around the rim of the lid, add a tag with your Christmas greeting and directions.  Typically, you add a couple of tablespoons to your bath water, relax, and enjoy. 

This linen spray is especially beneficial when your house is shut up due to the winter weather, and you need things freshened up.  You can use this spray on linens, pillows, mattresses, curtains, and furniture.  

Linen Spray:
1/2 cup distilled water
1 tsp. vodka or witch hazel
10 drops essential oils (we like use lavender, lemon, or lemongrass)

Mix these ingredients together and pour into a spray bottle.  I have several spray bottles of different scents around the house.  For gifts, you can purchase 2oz. mist bottles at Target and Wal-mart.  They are a perfect size for the linen sprays.

NOTE:  If you use vodka for your mix, you have to mix and pour quickly as the alcohol will evaporate quickly.  Always keep your linen mix stored in an air-tight container or mason jar, or in a spray bottle.


Wednesday, November 07, 2012

Natural Popcorn Flavorings

Our family loves popcorn.  It's a treat to have a big bowl in the middle of our family game night or movie night.  But my husband is the master of popcorn flavoring.  All of his concoctions have been good, but we do have our favorites.


We buy our organic multicolored popcorn in bulk from Azure Standard.  It pops up white, but the hulls and kernels are still colored.  My husband puts about a tablespoon of coconut oil in the bottom of a medium-sized pot.  Then, he throws enough kernels in the pot to cover to bottom, and cooks on medium heat.  Put the lid on and swirl the pot around occasionally so the kernels are constantly stirred.  When the kernels begin to pop, make sure you gently shake the pot every so often to ensure the unpopped kernels are settling to the bottom.  You may have to remove the lid and pour off the popcorn that has reached the top, but be careful not to pour off too much. You'll end up getting unpopped kernels in your popcorn bowl.  


After your popcorn is ready and it's still warm, you can add one of the following mixes.

All mixes are to taste.


Salt and Pepper Mix
Sea salt and cracked black pepper

Dill Flavored Mix (My personal favorite)
Fresh or dried dill and sea salt

Parmesan Mix
Fresh, finely grated Parmesan cheese and sea salt

Paprika Pepper Mix
Fine-ground paprika and sea salt. 

Garlic Flavored Mix
Finely ground garlic powder and sea salt. 


Tuesday, November 06, 2012

Healthy Fun Kid Snacks

Snacks have come a long way from when I was a child.  The only processed snack time treat I was ever allowed was the occasional bowl of gold fish crackers.  Otherwise, it was fresh fruit, nuts, sometime I baked, or nothin'.   Now children (and adults) are fed a fast-food, quick snack diet of processed carbohydrates and sugars.

After ridding our home of sweets and junk several years ago, I found myself searching for a healthy alternative for snacks.  Here are several of our healthy, in-between meals, stomach fillers:

Dried fruits and nuts.  Easy and simple.  We usually purchase many pounds of "non-store shelf quality" organic apples and spend days drying and canning them.  So, I usually have plenty of dried apples on hand!  The fruits and nuts store very well through the winter months.  A great staple to have on hand, especially if you find a great deal on fresh apples and want to stock up!


Pretzels and mustard.  I have no idea how this tradition started, but all of my children love the combination of pretzels dipped in mustard.  By the way, pretzels are fun and fairly easy to make!

Fruit Salad.  We usually make a quick fruit salad when we have a few fruits on hand that are nearing the end of their freshness stage.  It also comes in handy when you have odds and ends of your fruits left over.  Try dividing 13 grapes up among 9 children...

Frozen Grapes.  Speaking of grapes.......again, if you run into a great organic deal, you can freeze extra grapes to eat later.  My children love them right out of the freezer.  A nice treat for a hot day!

Fruit Kabobs. Way fun and easy for little ones to assemble.  You can even make a learning game out of it and gather several fruits related to the various colors of the rainbow.

healthy snacks healthy snacks healthy snacks drewhallmann healthy-food


Pita Chips and Mango Salsa.  One of my favorites.  It's refreshing, sweet, and I promise to post my recipe.  Soon.  Promise...

Fruit and Yogurt.  Make a dip out of your yogurt, or mix a bowl of berries and yogurt as the dressing.  Yum!

Peanut Butter and Apples.  A classic.  You can't go wrong.

Ants on a Log.  One of my girls' favorite treats to make for the littles.  You fill a piece of celery with cream cheese or peanut butter, and then place raisins on top.  Just like ants on a log.  ;)


Homemade Cheese Crackers.  I actually made little cheese crackers.  The twins helped me cut them out and bake them.  It was work, but not any more than one would go through to made sugar cookies.  I made a large batch, and then we cut out tiny little square and circle shapes.  About 2" in width and diameter.  Turned out pretty good, and they stored better than I expected.  You could probably freeze them if necessary, but they didn't last long around here.

Bread, Butter, and Jam.  On bread making day, my children come from all corners of the house and just sit in the kitchen.  Some will actually go find the butter and jam in order to prepare for the hot-from-the-oven slices.  Of course, this isn't the best healthy snack, but I baked the bread, we made the organic butter, and cooked up the homemade jam.  Makes me feel a little better...

Trail Mix.  I keep a jar of mixed nuts, dried fruit, and sunflower seeds in the pantry.  It's also an easy grab for when we are heading out of the house and need a quick, take-along snack.

Organic Cereal O's.  While my little ones are still pretty small, the organic O cereals are easy for their little fingers and soften up quickly.  My favorite are the Fruitful O's from Cascadian Farm Organic.  The O's are colored with elderberry juice, pumpkin juice, and apple juice.

Granola.  I make granola, for cereal, but the children enjoy throwing some in a bowl and snacking on it.

Granola Bars.  There are many organic companies that make granola bars.  They can be expensive, so we save them for car trips, or special park days.

Cheese and crackers.  Pretty simple.  And no, not Ritz and squeeze cheese.  Gross.

Popcorn.  We buy organic colored popcorn in bulk.  To be exact, 25 pounds at a time.  My husband has several popcorn concoctions that are really good!  Another promised recipe to share.  

Home-baked cookies.  Again, not the most healthy, but we do make all of our baked goods from whole grains, and all-natural, organic ingredients.  It's nice to have a warm cookie and a glass of raw jersey milk as a treat. 

Fruit.  Just plain ol' fruit.  Many times, in the afternoon, when my children head out to play, they rarely ask for a snack.  In all seriousness, I will find them snacking on green beans and cherry tomatoes right from the garden.  You can't ask for a more healthy snack!  Right now, the citrus trees are ripe, and I have found orange peels scattered on the ground outside.  Thank the Lord for a good harvest.


Fruit Smoothies.  Another idea for frozen and over-ripe fruit.  Add a banana, some frozen berries, a little apple juice, maybe some ice, and you have a nice, filling, healthy snack.

Carrots, Celery, and Dressing.  My husband makes dressings that are to die for.  All natural, organic, and made from yogurt and homemade mayo.  We keep a container of cut up celery and carrots in our refrigerator most of the time.  It's easy to snack on, with or without the dressing!

Pinterest.  Pinterest is a good place to find fun snack recipes.  If you aren't already a follower of Homestead Journey, you can find me here!

What are some of your healthy, wholesome snacks?

Tuesday, October 30, 2012

Making Kale Chips

Kale chips have made a regular appearance in our house.  Admittedly, we were once addicted to store-bought, sodium-laced, processed, cholesterol ridden potato chips.  Paints a palatable picture, huh?

Once I discovered how to make kale chips, my family has found a new addiction and inhales the crunchy (and healthy) snack.

Start off with fresh, washed, organic kale.  Sadly, this bunch of kale was a little past its prime.  Remove any bad parts and then tear the kale up into small, bite sized pieces.  I tear all of the leafy parts away from the stalk and then compost what's left.


Place your kale pieces on a baking sheet, drizzle with olive oil, and sprinkle lightly with sea salt.  


Bake in a 350 degree oven for approximately 15 minutes.


Above is what your kale will look like going into the oven.
Below is what it should look like coming out.

I cook it until the edges are just brown and crispy.  It will look like it's not quite done, but as it cools, the pieces will be very crisp.


After the chips are cooled, I put them into a plastic baggie or sealed container with a paper towel to absorb any excess oil.

They keep pretty well for a few days. 

Enjoy!

Friday, October 26, 2012

Reusable Cloth Feminine Liners

Before you get all weirded out on me...

This post has been a long time coming.  I struggled with writing on a subject so personal for some time.  However, after having been asked what I use for my "personals" by a few people, I decided the blogged information, no matter how intimate, may be of good use. 


I began using washable liners about 10 months ago.  

They are soft, comfortable, and absorbent.  Not to mention economical.

My reasoning for switching to cloth was I one day became aware of chemicals (including bleach) present in disposable pads.  Just like disposable diapers, there have been skin sensitivity issues and long-term concerns regarding feminine products.  And my daughter and I were having problems with rashes from store-bought pads.  I couldn't afford organic liners, and I like the "waste-not" idea of reusable products.  So, I got online in search of a good pattern.


Patterns
You can purchase feminine products like these online, but I made mine.  They were very easy, the pattern was simple to follow, or if you don't want to purchase a pattern, you can easily make your own from a disposable pad.  

Supplies
All you need is flannel, fleece, and PUL fabrics.  The fleece sits against your skin, the flannel is in between layers for absorption, and the PUL is on the outside keeping moisture from seeping out.

I suggest you look for your fabric through sources other than the major fabric stores.  A good place to go is fabric.com, and etsy.com.  If you do happen to find yourself inside a big-name fabric store, check out the remnants section for the above supplies. 


I have little wear on my liners, they work very well, I rarely have leaks, I love they way they close up into a small package (above picture), and I plan to make several more.  The only thing I would do differently is use a snap closure instead of the velcro.  The velcro tends to wear over washings and doesn't adhere as well. 

Forgive my post for its lack of discretion, but I do hope the information proves itself useful for those questioning the switch from disposable to washable. 


Edited to add:

Wash and Care:
I treat my cloth liners just like my cloth diapers.

http://ahomesteadjourney.blogspot.com/2011/09/on-cloth-diapering.html

I wash them on a hot rinse cycle first, then I wash them on a regular warm water cycle with my cloth diaper detergent.  You don't want to use any detergents other than those specially made for cloth diapers as regular laundry detergent can create a buildup on the liners resulting in their inability to absorb moisture.

Also, steer clear of essential oils as they may oppose moisture.

I only hang the liners up to dry.  I do my best to hang them in an inconspicuous place, but that's hard in a household of 11 people.  :)  If you do dry them in your dryer, adjust the setting to a delicate or low heat cycle.

Thursday, October 25, 2012

Using All-Natural, Environmentally Safe Cleaners

I gave up on harsh chemical cleaners several years ago.

One day, after my ritualistic cleaning in which I worshiped bleach and drank in the aroma of pine cleaner, I realized that the smell of both infused my lungs and each time I inhaled, all I smelled was bleach.  My lungs burned, I rushed outside into the open air, breathed deeply, but I still only smelled the cleaning products.  It took at least an hour to feel like I could breathe pure air again.  What may have been a "duh" moment for some, sent me into a deep research of the harmful side effects of chemical cleaners.  I dumped everything and began my journey of all-natural cleaners.


What's on my cleaning shelf?
Baking Soda
Vinegar
Thieves Essential Oil
Lemon Essential Oil
Spray Bottles

Baking Soda
I use baking soda to scrub toilets, bathtubs, sinks, and counters.
I just sprinkle a little on my work surface, and scrub with a damp terry towel, or scrub brush.  Baking soda is a bit gritty, so it helps with the deep scrubbing.  I haven't had a problem with scratching, but if you have a very sensitive surface, you might consider diluting your baking soda, or using a vinegar rinse instead.

Vinegar
Vinegar is effective against most mold, bacteria, germs, and smells.  On stubborn surfaces, I use white distilled vinegar full strength, however, when washing windows spot cleaning, or cleaning most surfaces, I dilute it with water 50/50 and pour into a spray bottle.

I use vinegar for cleaning sinks, toilets, door knobs, counters, light fixtures, windows, carpets, floors, basically anything I would have used a chemically induced glass cleaner for.

It also helps get rid of urine smells.

Essential Oils
The effects of essential oils not only adds the benefit of antioxidants at work, but also leaves a cleaning area smelling a little better than the vinegariness of vinegar.

I have a spray bottle filled with a mixture of water and Thieves oil.  This blend is used for quick cleanups, and used on surfaces that aren't "germy" just in need of a good cleaning.  AND it smells so refreshing!  I also use Thieves in my mop water.  The mop bucket gets filled with pure water, and then I add about 6 or 7 drops of Thieves.

Lemon oil is perfect for a toilet freshener.  You can drop a couple of drops in your toilet water or water reservoir, and it helps keep your toilet from gathering grime, mold, or stink, in between cleanings.  I use lemon oil for dusting my wood furniture as well.  Add two or three drops of oil to a terry or dust cloth, and wipe down your wood surface.  Smells great and leaves a pretty shine!

Pretty simple, huh?  Not too complicated or expensive!

Thursday, October 04, 2012

Naturally Frugal

As a large family, we are always trying to find ways to keep our lives simple, frugal, and remain all-natural.  In our wasteful society, here are some changes we've made to transition from a "throw away" mentality, to a reusable one.

We don't use paper towels.

My husband bought several terry towels from Sam's, and this is what we use for all of our cleaning.  They are very absorbent, and are larger than a washcloth, but smaller than a hand towel.  So, they're not cumbersome while performing our cleaning task.


We use them for cleaning the toilets, sinks, spills, messes, spots on the floor, windows, tubs.........pretty much everything.  Then we just throw them in with the wash and we're done.

I still keep paper towels around for emergencies.  Like vomit.  Not a fan of the vomit.  Puke on the floor is not my favorite.  I'm pretty sure I'd much prefer to clean it up and toss it.  


We use cloth napkins.

We have both store bought napkins (thanks to a Target deal my hubby ran across), and handmade napkins.  The store bought napkins aren't very absorbent, so we started making our own.  The girls raided my fabric scrap box and pulled out any large scraps they could find.  They cut them to 15 "x 15" squares, sewed a 1/2" straight stitch all the way around the border, and left the hem raw so the edges would have a frayed look.  They don't all match and some have some crazy designs, but they're perfect, and the cotton will soak up any water or milk spill. 


And the cute basket came from a half-off Hobby Lobby sale.  I couldn't believe how perfect the size was for holding all of our napkins.  Truly a blessing to have them neatly folded in a "holder", as opposed to tossing them in a laundry basket and snatching up a wad of napkins to set the table with.


No More Bounce

About three years ago, I switched from dryer sheets, to wool dryer balls.  I have had the same 4 dryer balls this whole time and they are still in great shape.  You can find handmade dryer balls on Etsy, in many colors, and I love that I can drip a few drops of essential oils on them to fragrance my dryer.  No harsh chemicals, no synthetic perfumes, just natural wool and essential oils at work.

The dryer balls help control static electricity, and depending on how many you place in your dryer cycle (I use 2 - 4 at a time), the balls knock the clothes around aiding the drying process.  Your clothing isn't all in one lump rolling round and round in the dryer, instead it is constantly being separated by the dryer balls allowing more air to circulated through and speed up drying.


I will be posting more on all-natural, non-wasteful items we use around the house.  What are some of the ways you have made a change in reusable products?  I would love to hear your ideas!

Related Posts Plugin for WordPress, Blogger...